Multi-agent workflows, config commands, and true background yolo mode: amux v0.6
I've been using amux daily for all my personal dev projects the past few months, and though it is working incredibly well for my workflows, there were some codebase architecture issues I was ignoring in order to add all the feature ideas I had bouncing around in my brain. For this release I spent a lot of time refactoring the way that the CLI and the TUI share logic to ensure they behave identically, which solved a bunch of usability issues as a side effect.
If you're new here, amux is a terminal multiplexer for AI code agents that helps you run securely containerized agents in parallel, including multi-stage workflows, multiple tabs, and sandboxed claw agents. Install instructions below!
v0.6 also brings the ability to use several different agents within a single codebase more easily. It adds the --agent flag to amux chat and amux implement so you can launch a different agent than the default configured for the current repo. It also allows you to specify Agent: per step in a workflow - that means if you want Codex with GPT-5.4 to create an implementation plan and then have Opus-4.7 implement that plan, you can do so automatically.
In order to support this, amux now uses a "modular Dockerfile layout" which keeps your project-specific tooling in the main Dockerfile.dev, and moves anything agent-specific to new .amux/Dockerfile.{agent} files which layer agent tools onto the project base image. amux handles management of these files and images automatically, so if you have codex configured as your project's default agent but launch amux chat --agent claude, it will offer to automatically download the claude template, and build a claude-specific image before launching it in a container. Full support for Docker and Apple Containers. More details below.
# install or upgrade
curl -s https://prettysmart.dev/install/amux.sh | sh
One workflow, multiple agents
The big one: each step in a workflow can now name a specific agent.
## Step: plan
Prompt: Read the work item and produce an implementation plan.

## Step: implement
Depends-on: plan
Agent: codex
Prompt: Implement the plan from the previous step.

## Step: review
Depends-on: implement
Agent: claude
Prompt: Review the implementation for correctness and style.
Steps without an Agent: field use whatever agent is configured for the repo (or whatever you pass via --agent). Before the workflow starts, amux checks that every required agent image exists and walks you through building anything that's missing — you're not dropped mid-workflow with a missing image error.
You can also pass --agent on any single chat or implement invocation to override the configured agent for that session:
amux chat --agent codex
amux implement 0047 --agent gemini
amux config
Until now, configuring amux meant opening ~/.amux/config.json or .amux/.amux.json by hand. That was fine for initial setup but annoying for one-off changes and almost impossible to discover when the two files disagreed on a value.
amux config show
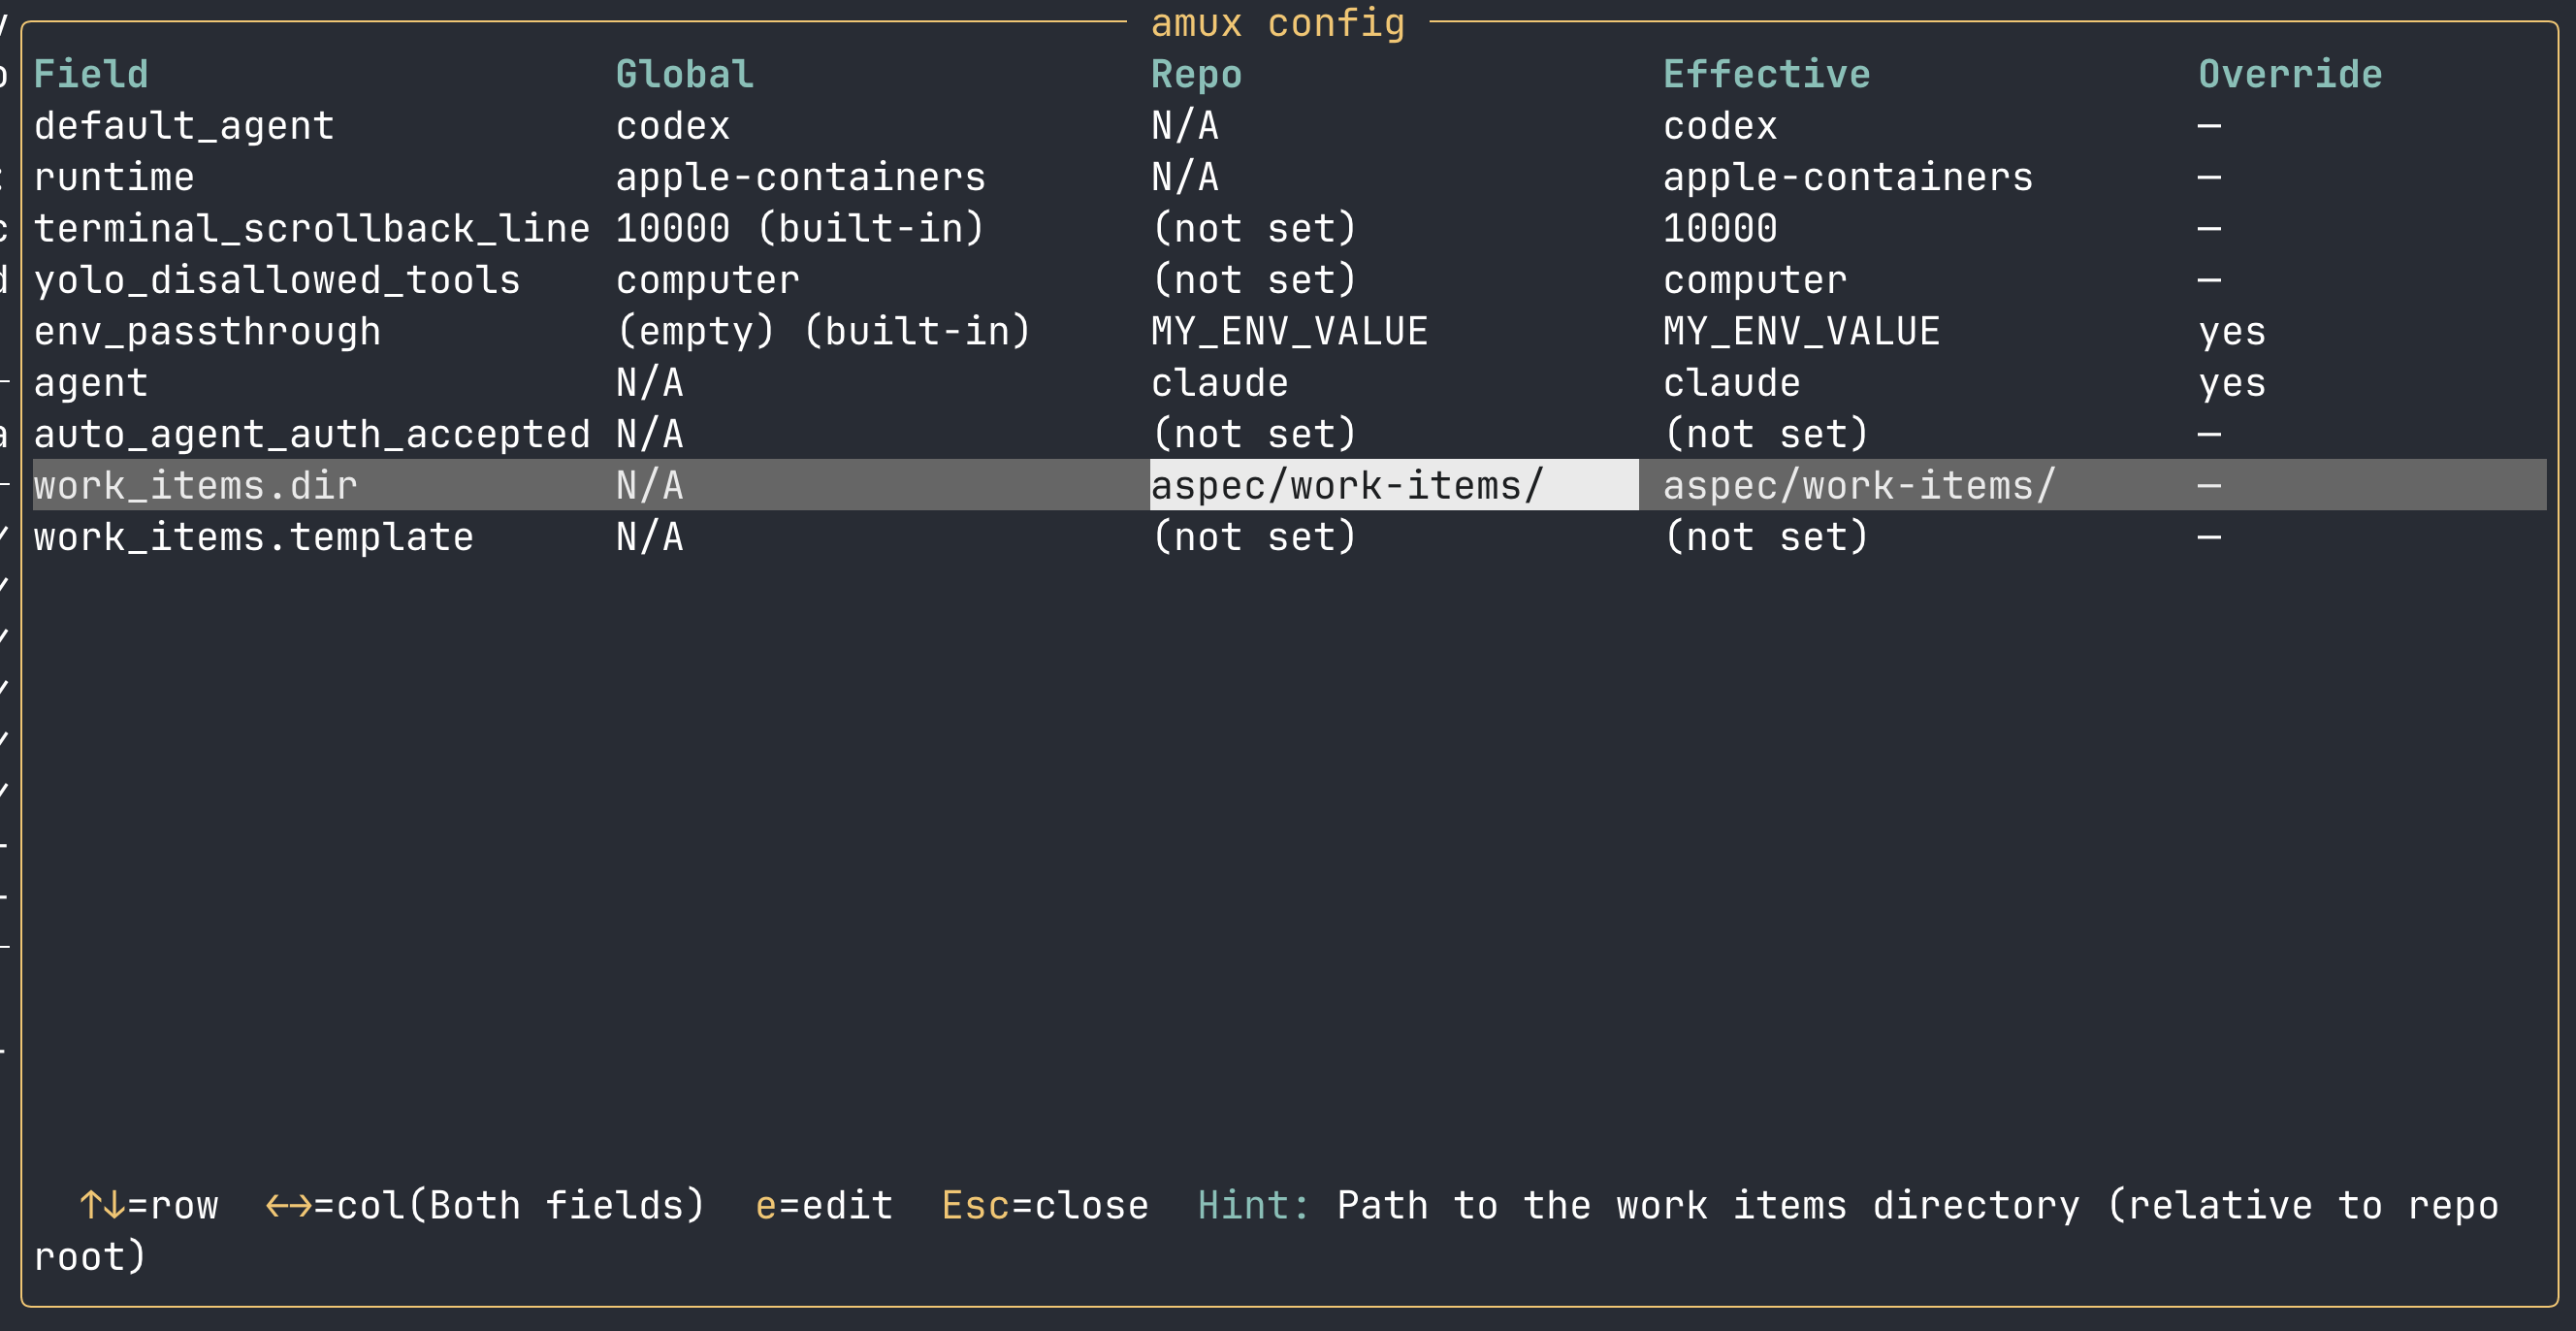
config show renders every available config field — even unset ones — helping you understand the global and repo config, built-in defaults, and an override indicator when the repo value overrides the global. config get <field> drills into one field. config set writes and warns you when the new value will be silently overridden.
amux config set agent codex
amux config set --global default_agent gemini
amux config set work_items.dir docs/work-items
amux works in any repo now
specs new and implement were hardcoded to look in ./aspec/work-items/ for your work item definitions. If your repo doesn't use that structure, you were out of luck. v0.6 fixes that:
amux config set work_items.dir docs/tickets
amux config set work_items.template docs/tickets/ticket-template.md
Once set, every amux command that touches work items uses the configured paths. This ensures you can use all of amux's features even if you haven't adopted the aspec pattern.
Yolo mode that actually runs in the background
The v0.5 yolo workflow auto-advance only fired for the active tab. If a workflow step finished on a background tab, nothing happened until you switched to it. That made running workflows in multiple tabs awkward since you had to keep checking.
Now the tab bar shows a live countdown for any background tab that's waiting:
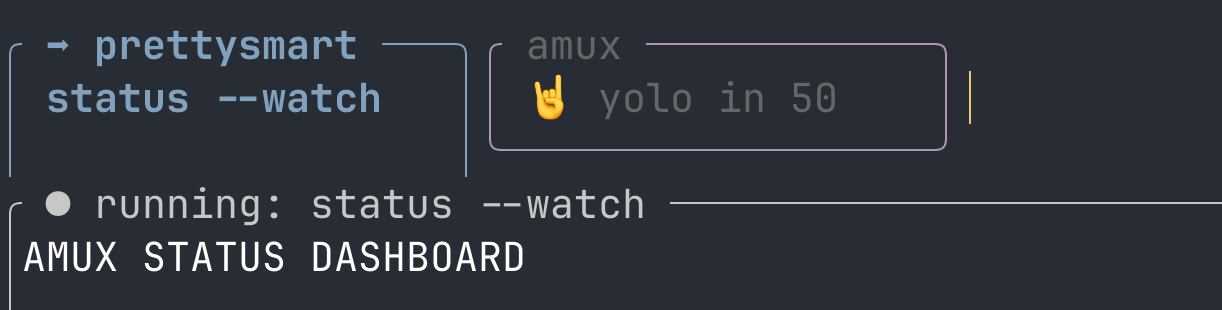
The tab flashes yellow and purple every second. When the timer hits zero, the workflow advances — no switching required. If you do switch to the tab mid-countdown, you can intervene or review what was done in the step before it moves forwards.
One more small thing: the stuck detector and yolo auto-advance no longer fire while you're actively scrolling through output on the active tab. Both the container and you have to be idle for 10 seconds before the countdown starts.
I hope you'll give amux a try and send me your feedback!
Source and issues at github.com/prettysmartdev/amux. More at prettysmart.dev. Feedback, bug reports, and contributions are welcome.